Business photography workflow guide for Calgary professionals
- Jeff Borchert
- 1 day ago
- 9 min read
TL;DR:
A structured business photography workflow ensures consistent, efficient results from pre-shoot planning to final delivery. Proper preparation, clear communication, and reliable backups help Calgary professionals produce on-brand images that meet expectations. Implementing these steps saves time, reduces stress, and builds long-term client trust.
Getting your business photography right the first time is harder than it looks. A lot of Calgary professionals book a shoot, show up, and hope for the best — then wonder why the photos feel off-brand, inconsistent, or just never get used. A clear business photography workflow changes all of that. It turns a stressful, unpredictable process into something repeatable, efficient, and genuinely exciting to see come together. This guide walks you through every stage, from pre-shoot prep to final delivery, so your next corporate shoot produces images you’re proud to put front and centre.
Table of Contents
Key Takeaways
Point | Details |
Workflow stages | Business photography involves four main stages: prep, shooting, post-production, and delivery. |
Insurance readiness | Securing a Certificate of Insurance early prevents delays and builds client trust. |
Consistent execution | Replicable setups and batch edits save time and ensure consistent branding. |
Organized delivery | Using cloud platforms and backups protects and simplifies photo access. |
Professional partnership | Working with a local expert enhances quality and streamlines project management. |
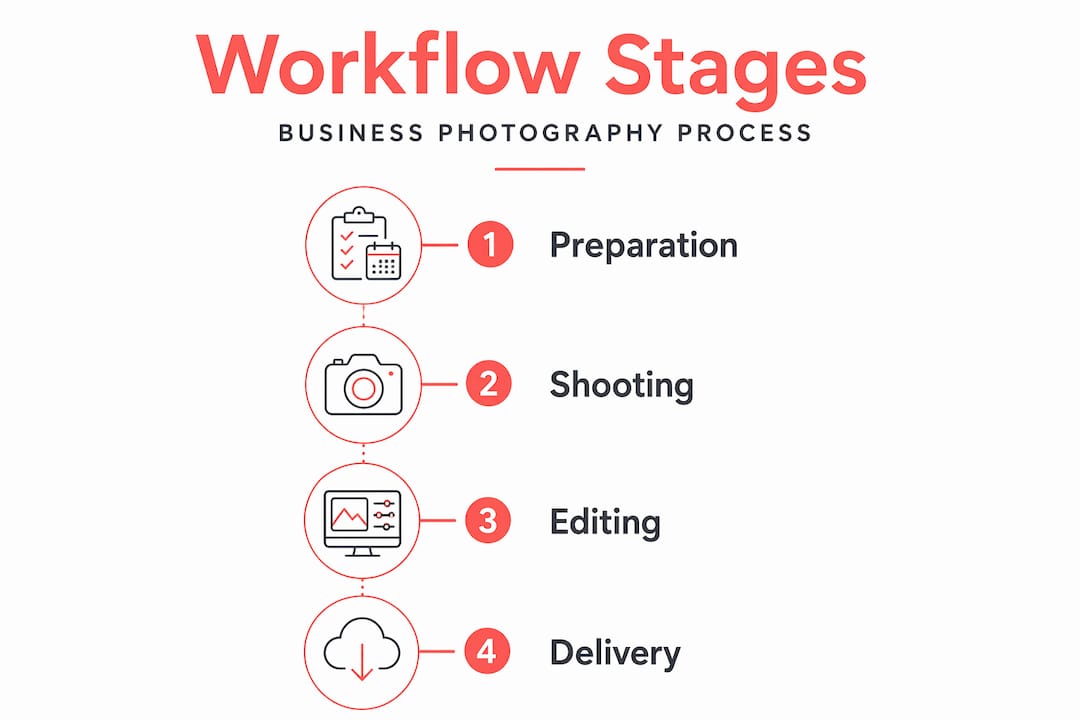
Understanding the stages of a business photography workflow
Every great set of corporate photos starts long before the camera comes out. A complete business-photo workflow can be structured into four primary stages: pre-shoot preparation, shooting, post-production, and delivery/storage. Each stage has its own set of tasks, and skipping any one of them tends to show up in the final results.
Think of it like building a house. You wouldn’t frame walls before pouring the foundation. The same logic applies here. Rushing into a shoot without proper planning is how you end up with mismatched lighting across a team of 20 headshots, or a gallery that sits in a Dropbox folder because nobody knows how to use it.
Here’s a quick look at what each stage covers:
Pre-shoot preparation: Brand alignment, scheduling, location confirmation, equipment planning, and insurance paperwork
Shooting: Consistent lighting setup, subject management, time scheduling, and on-site communication
Post-production: Culling, editing, colour grading, and file organisation
Delivery and storage: Export formats, cloud delivery, archiving, and backup
Understanding corporate photography basics is the foundation that makes every stage easier to execute. Let’s compare what a workflow looks like with and without proper structure:
Element | With a clear workflow | Without a workflow |
Brand consistency | High, repeatable across all images | Inconsistent, varies by shoot |
Shoot day stress | Low, everything is planned | High, reactive and chaotic |
Editing time | Faster with presets and batch tools | Slow, each image treated individually |
Delivery speed | Predictable, on schedule | Delayed, disorganised |
Client satisfaction | Strong, expectations are met | Mixed, often disappointing |
Now that you understand why a workflow matters, let’s explore each stage in detail, starting with preparation.
Pre-shoot preparation essentials for Calgary professionals
This is the stage most people underinvest in, and it’s the one that causes the most problems on shoot day. Good headshot preparation tips always start weeks before the session, not the morning of.
Here’s what needs to happen before any camera is unpacked:
Confirm the number of subjects. Whether you’re photographing one executive or an entire department, knowing the headcount shapes everything from scheduling to equipment.
Lock in the location. On-location shoots at Calgary offices or venues often require advance approval and specific access arrangements.
Review brand guidelines. Colour palettes, background preferences, wardrobe notes, and logo placement all need to be discussed before the shoot, not during it.
Prepare your equipment list. Lighting, backdrops, batteries, memory cards — build a checklist and run through it the night before.
Confirm insurance requirements. This one surprises a lot of people.
In Canada, a Certificate of Insurance (COI) is commonly requested by commercial clients. Issuing a COI can take anywhere from a few hours to a couple of business days, so you need to confirm insurance requirements at least a week before the shoot. A COI reassures clients that you have active business insurance showing coverage details, which is critical for accessing private properties and commercial contracts.
Pro Tip: When booking a corporate shoot at a Calgary office tower or event venue, ask the facilities manager about their COI requirements on your very first call. Some buildings require specific coverage amounts that take extra time to arrange.
Here’s a simple pre-shoot data checklist to keep things on track:
Task | Timeline | Owner |
Confirm subject count and schedule | 2+ weeks out | Client and photographer |
Review and document brand guidelines | 2 weeks out | Both parties |
Submit COI to venue or client | 1 week out | Photographer |
Equipment check and backup gear prep | 1 to 2 days before | Photographer |
Send subject prep notes (wardrobe, timing) | 3 to 5 days before | Photographer |
Getting corporate headshot tips right starts here, with the paperwork and planning that most people skip. With thorough preparation in place, you’re ready to handle the complexities of the shoot day itself.
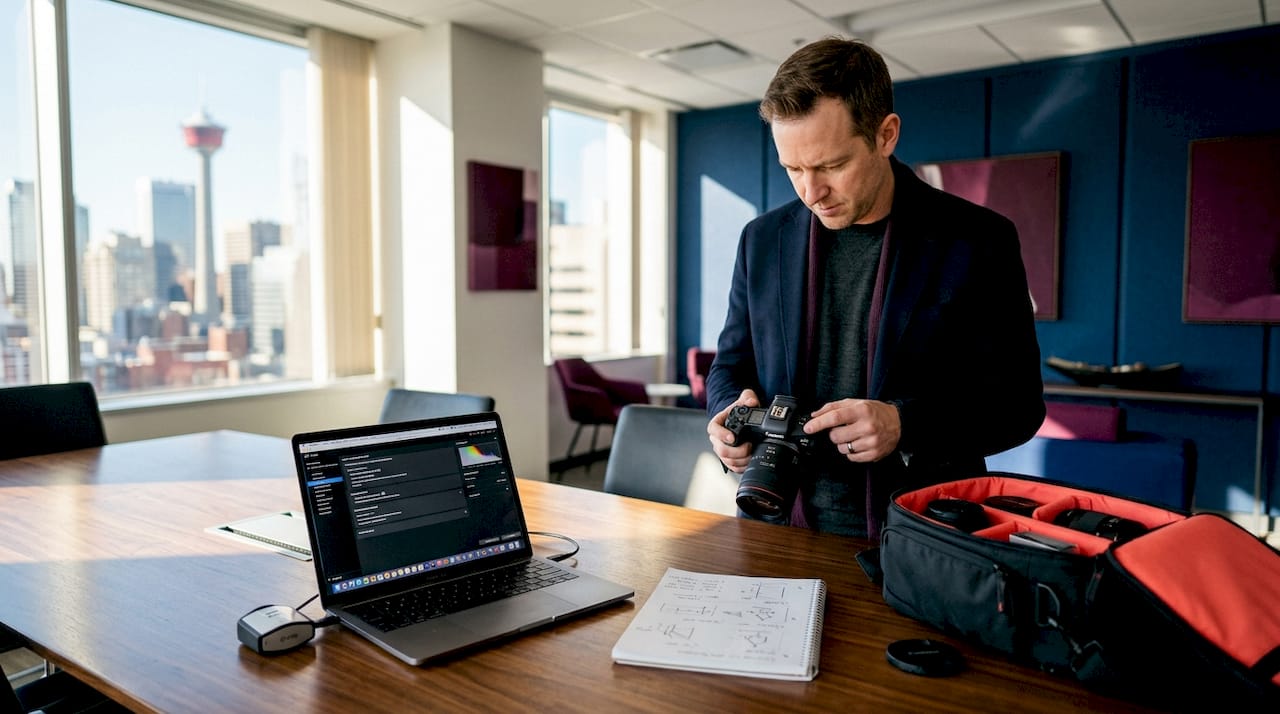
Executing the shoot: tips for professional results
Shoot day is where preparation pays off. When everything is confirmed in advance, you walk in calm and confident. When it isn’t, you spend the first hour scrambling. Here’s how to run a shoot that stays on track:
Set up your lighting and backdrop before the first subject arrives. A repeatable setup means every person in a 30-person team shoot looks like they belong in the same photo library. Adjust for height and skin tone, but keep the core arrangement locked in.
Schedule realistically. A day photographing many professionals on a clean background differs greatly from environmental portraits involving more production. For standard corporate headshots, plan 10 to 15 minutes per person. For executive branding portraits with wardrobe changes, double that.
Brief your subjects before they step in front of the camera. A 60-second walkthrough of what to expect reduces nervous energy and produces better expressions. People relax when they know what’s coming.
Keep a shot list visible. Tape it to a stand near your camera. It’s easy to get caught up in the energy of a busy shoot and forget a key deliverable.
Communicate with the client contact on-site. Designate one person from the client’s team to manage subject flow. This keeps things moving without you having to chase people down.
Pro Tip: Shoot a test frame with a stand-in before the first real subject steps in. Check your exposure, white balance, and framing. It takes two minutes and saves you from discovering a settings error halfway through the day.
After capturing the images, the workflow moves into the vital post-production phase to enhance and organise your photos.
Post-production workflow: organising, editing, and delivering images
Post-production is where a lot of time gets lost, and where a good workflow for commercial photography really earns its keep. The goal is consistency and speed, without sacrificing quality.
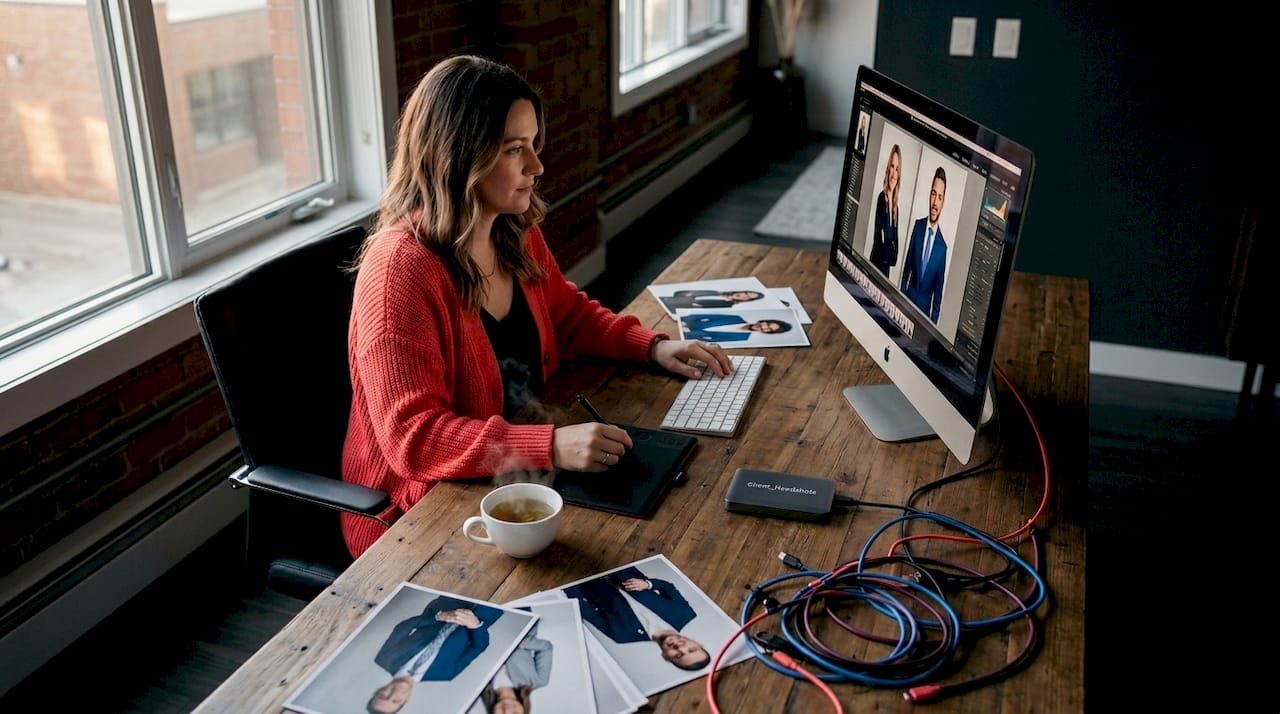
Start with culling. Many pros avoid culling inside Lightroom to save time and maintain speed. Doing heavy culling in faster tools first keeps Lightroom responsive and editing efficient. Tools like Photo Mechanic are purpose-built for fast selection and can cut your culling time dramatically.
Once your selects are in your editing software, here’s how to keep things moving:
Build and apply presets. A well-crafted preset handles 80% of your edit in one click. Develop it from a strong base image, then apply it across the batch.
Sync edits across similar images. If 15 headshots were taken in the same lighting setup, sync your exposure and colour corrections across all of them at once. Adjust individually only where needed.
Retouch efficiently. For corporate headshots, light skin smoothing and blemish removal are standard. Keep it natural. Over-retouching is a common mistake that makes photos feel dated.
Organise your files with clear naming conventions. Something like “ClientName_Date_SubjectLastName_001.jpg” makes it easy to find any image months later.
Pro Tip: Create a dedicated export preset for each delivery format: web (72 dpi, sRGB, JPEG), print (300 dpi, CMYK-ready TIFF), and social media (square crop, optimised file size). One click per format saves real time.
Here’s a quick reference for file organisation:
File type | Resolution | Colour space | Use case |
Web JPEG | 72 dpi | sRGB | Website, LinkedIn, email |
Print TIFF | 300 dpi | CMYK | Brochures, print ads |
Social JPEG | 72 dpi, square | sRGB | Instagram, Twitter/X |
Archive RAW | Full resolution | Native | Long-term backup |
Applying photo editing techniques from commercial work translates beautifully to corporate photography. With images processed and organised, the final step ensures your photos reach their intended audience effectively.
Delivery, storage, and maximising your photography investment
You’ve done the planning, the shooting, and the editing. Now it’s time to get those images into the hands of the people who need them, and keep them safe for the long haul.
For delivery, cloud-based gallery platforms are the standard. They allow clients to review, select, and download images without needing to manage file transfers. A good photo branding strategy includes making sure your images are easy to access and use across all your marketing channels.
Here’s what a solid delivery process looks like:
Export images in multiple formats and sizes tailored to web, print, and social media
Deliver via a secure cloud gallery with download permissions set by file type
Include a brief usage guide for clients who aren’t sure which file to use where
Set a gallery expiry date and communicate it clearly so clients download what they need
For storage and archiving, follow the 3-2-1 rule:
Keep three copies of every project: your working files, a local backup, and a cloud backup.
Store them on two different media types (for example, an external hard drive and a cloud service).
Keep one copy offsite or in the cloud at all times.
This isn’t just good practice. It’s the difference between a minor inconvenience and a complete loss if a drive fails. Smooth delivery and long-term success depend on strong archiving and backup habits, especially for commercial clients who may need to access images years after the original shoot.
Having completed the workflow steps, let’s explore a fresh, practical perspective on managing business photography projects.
Why a streamlined business photography workflow is a game changer for Calgary professionals
Here’s something I’ve noticed over and over: the professionals who get the most value from their photography investment are almost never the ones with the biggest budgets. They’re the ones who show up prepared.
The pre-shoot admin, the COI, the brand brief, the subject schedule — these feel like bureaucratic hurdles until you’ve experienced a shoot where they were skipped. Confirming insurance and logistical details well in advance prevents costly delays and lost contracts, and it’s a lesson many photographers and clients learn the hard way. I’ve seen shoots get cancelled at the door of a building because nobody confirmed the insurance requirements. That’s a real cost, in time, in money, and in missed deadlines.
Consistency in setup and post-production is what separates a gallery of professional images from a folder of decent photos. When every image in a team headshot series has the same light quality, the same background tone, and the same editing treatment, the result feels like a brand. That’s what gets used on websites, in proposals, and on LinkedIn. That’s what builds trust with the people who see it.
The time you invest upfront in workflow planning pays back in smoother shoots, faster editing, and clients who come back. It also makes the whole experience more enjoyable for everyone involved. When the process is clear, subjects are more relaxed, clients are more confident, and the photos show it.
Understanding the insurance requirements in Canada and building them into your standard process is one of those small things that signals professionalism immediately. It’s the kind of detail that turns a one-time client into a long-term partner.
Professional photography solutions for your business in Calgary
If you’ve read this far, you already know more about business photography workflow than most people who book a shoot. Now imagine having all of that handled for you.
[
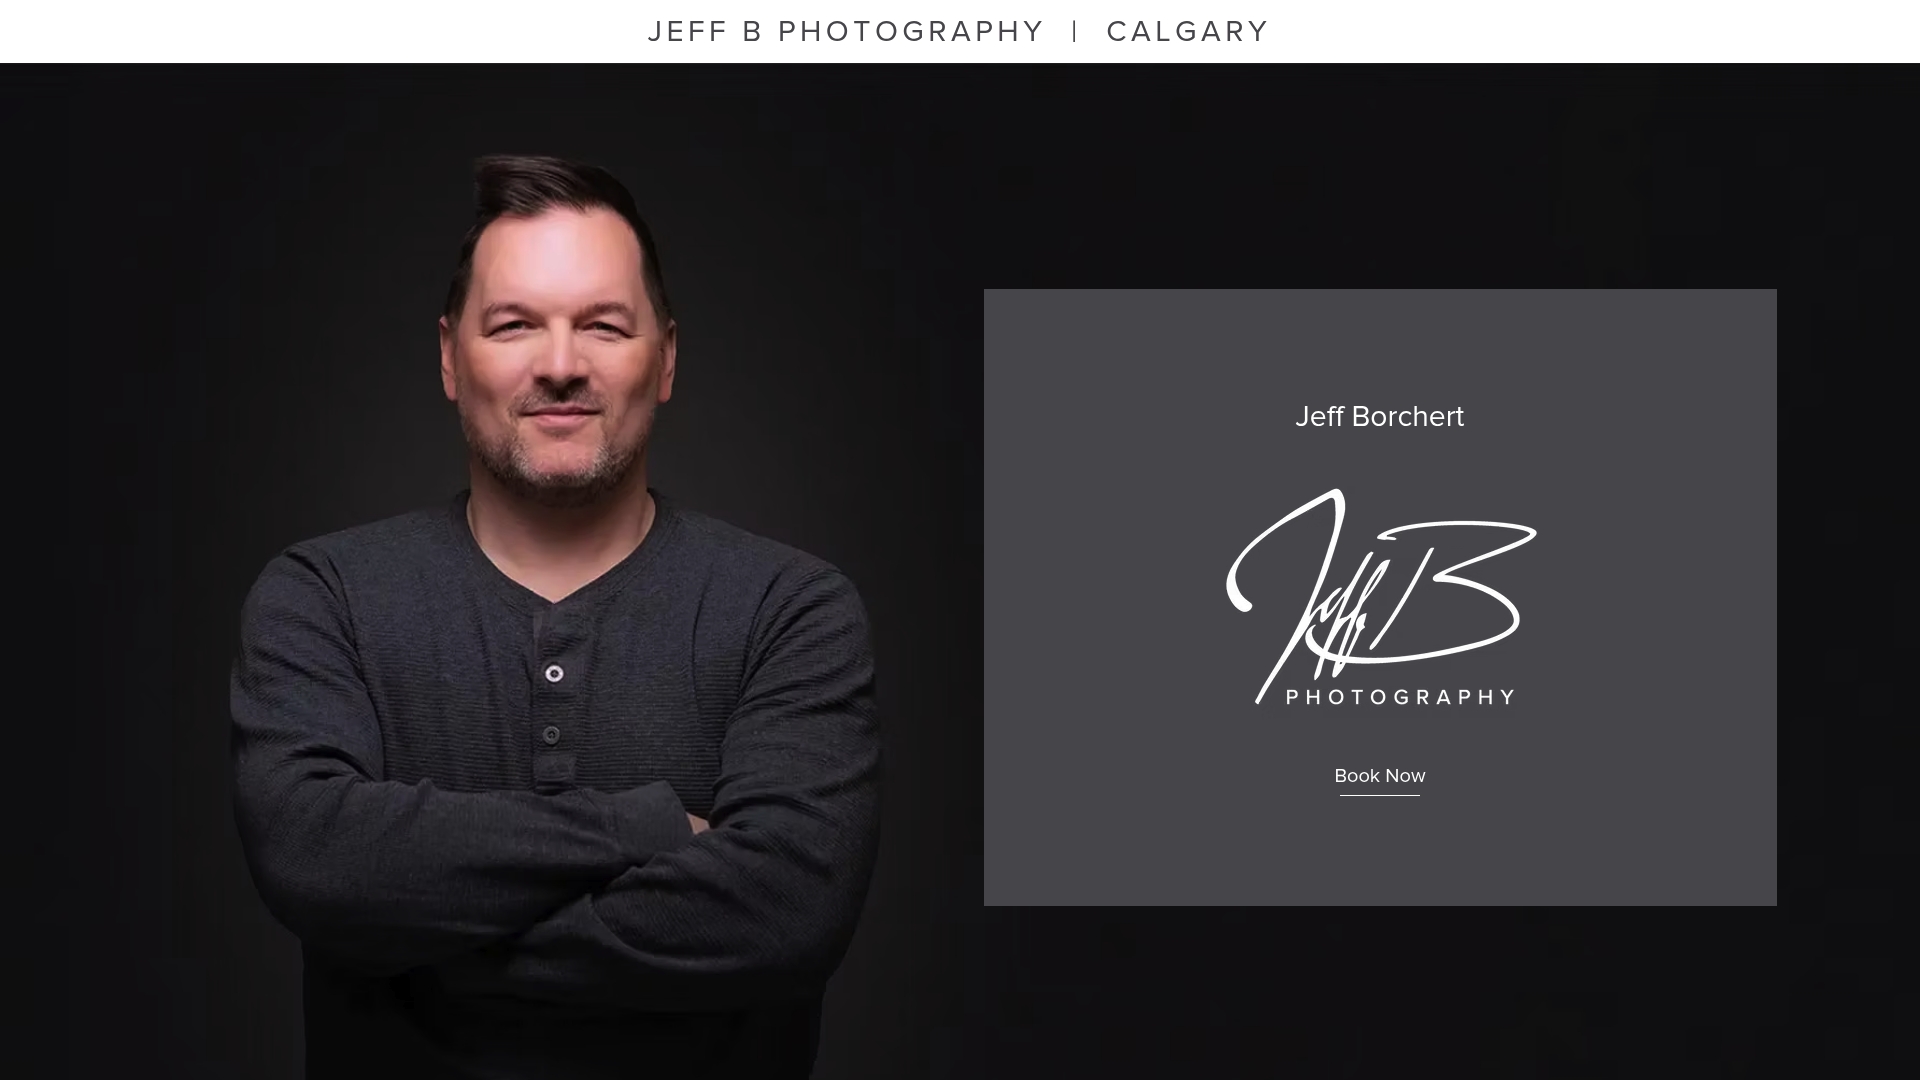
At Jeff B Photography, we work with Calgary businesses to deliver corporate headshots and branding imagery that are built around your goals, your brand, and your timeline. Every session comes with a clear process: pre-shoot planning, efficient on-location execution, and polished delivery in the formats you actually need. Whether you’re refreshing your team’s LinkedIn photos or building a full library of branding photography for your website and marketing materials, the experience is designed to be easy, guided, and worth every minute. Let’s make sure your next shoot produces images you’re genuinely excited to use.
Frequently asked questions
What is a business photography workflow?
A business photography workflow is a structured process covering preparation, shooting, editing, and delivery to ensure consistent, professional images that reflect your brand accurately and efficiently.
Why do I need a Certificate of Insurance (COI) for a corporate photo shoot in Calgary?
A COI proves active business insurance with coverage details, which many Calgary venues and commercial clients require before granting access to their premises for professional photography work.
How far in advance should I arrange my business photography shoot?
Plan and confirm all shoot details, including insurance and brand guidelines, at least a week in advance, because issuing a COI can take anywhere from a few hours to a couple of business days.
What are best practices for editing and delivering corporate photos?
Cull first with faster tools before importing selects into Lightroom, apply batch presets for consistency, and deliver optimised files in multiple formats via a secure cloud gallery.
How should I store and back up my business photography files?
Follow the 3-2-1 rule: keep three copies of every project on two different media types, with at least one copy stored offsite or in the cloud to protect against data loss.
Recommended
Comments