
Studio photography: your professional image guide
- Jeff Borchert
- 10 hours ago
- 9 min read
TL;DR:
Studio photography offers controlled environments that produce consistent, high-quality images for headshots, branding, and team photos. Simple lighting setups with a key and fill light often outperform complex arrangements, emphasizing light quality over quantity. Preparation, including wardrobe selection and consulting with photographers beforehand, ensures confident sessions and polished results.
Studio photography has a reputation for being complicated, expensive, and reserved for celebrities or big brands. That reputation is wrong. Whether you’re a professional looking for a strong LinkedIn headshot, a small business building brand imagery, or a team that needs consistent corporate portraits, studio photography delivers results that on-location shoots simply cannot replicate. This guide covers the types of sessions available, how studio lighting techniques actually work, what to expect on shoot day, and how to choose the right photographer. By the end, you’ll know exactly what you need to walk in confident and walk out with photos you’re proud to use.
Table of Contents
Key takeaways
Point | Details |
Studios offer control | Consistent lighting and environment produce more reliable, professional results than on-location shoots. |
Simple lighting wins | One or two lights with quality modifiers often outperform complex multi-light setups for portraits. |
Preparation matters | Wardrobe choices, makeup, and a pre-shoot consultation directly affect your final images. |
Equipment supports results | Studio dimensions, backdrop distance, and lens selection all shape image quality significantly. |
Choose by portfolio | Evaluate a photographer’s existing work, client reviews, and session process before booking. |
What studio photography actually covers
Let’s clear something up right away. Studio photography is not a single thing. It’s a broad category of professional photography that takes place in a controlled environment, and it covers far more ground than most people realise.
The most common session types include:
Corporate headshots for LinkedIn profiles, company websites, and press materials
Personal branding portraits for entrepreneurs, coaches, speakers, and creatives
Team headshots where consistency across multiple individuals is critical
Event and conference portraits that can be set up on-site with portable studio gear
Family and children’s portraits that benefit from a relaxed, guided environment
The real advantage of a studio setting is control. Natural light shifts constantly. Weather changes. Outdoor backgrounds introduce distractions. Inside a dedicated studio, the photographer controls every variable. The lighting stays consistent from the first shot to the last, which matters enormously for team headshots where twenty people need to look like they were photographed at the same moment.
Portrait studio imaging also removes the logistical chaos of scouting locations, managing permits, or hoping the sky cooperates. When you book a professional studio session, you’re buying predictability. The colours in your brand palette stay consistent. The background stays clean. Your images carry a cohesive look across every platform you use them on, from your website header to your business card.
That cohesion is not a luxury. For businesses especially, professional studio photos communicate trust at a glance. Clients and partners judge credibility quickly, and polished, consistent imagery sends a clear signal.
Mastering studio lighting techniques
This is where most people get confused, and honestly, where most photographers overthink things too. The myth is that great studio photos require a room full of expensive lights firing in all directions. The reality is quite different.
Controlling light direction and quality is far more important than the number of lights you use. A single well-placed light with a large softbox or octabox often produces more depth and dimension than a complicated six-light setup. More lights mean more shadows, more variables, and more chances for something to go wrong.
The core lights and what they do
A typical studio portrait setup uses a small number of lights, each with a specific purpose:
Key light: The main light source, usually placed 30 to 45 degrees to the camera and slightly above eye level. This shapes the face, creates depth, and defines features.
Fill light: Softens shadows created by the key light. This can be a second light at lower power, or simply a reflector.
Background light: Adds separation and controls whether the background reads as dark, bright, or neutral.
Rim or hair light: Placed behind the subject to create a subtle edge of light that separates them from the background.
For most headshots and portraits, the key light and a fill are genuinely all you need. Using reflectors or bounce cards as fill softens shadows without adding more powered lights, which keeps the setup clean and the results natural.
The choice between continuous LED lights and strobe lighting also shapes how a session feels. Continuous lights offer real-time feedback, which helps clients see what’s happening and reduces surprise. Strobes deliver more power and freeze motion more cleanly, which suits high-volume team sessions where speed matters. Neither is universally better. It depends on the session type and the photographer’s experience.
Pro Tip: If your photos look flat, the fix is rarely “add more lights.” Try moving your key light closer to the subject, increasing the angle, or switching to a larger modifier. Light quality, not quantity, is what creates that polished, three-dimensional portrait look.
Preparing for your studio session
Walking into a studio without preparation is a bit like showing up to a job interview without reviewing your notes. You can do it, but a little groundwork makes everything better.
Here’s how a typical professional studio session flows:
Pre-shoot consultation: A good photographer will discuss your goals, brand style, and how you want to use the images before shoot day. This conversation shapes everything from lighting to wardrobe guidance.
Arrival and setup: You arrive, settle in, and get a quick orientation. The environment should feel calm and welcoming, not clinical.
Wardrobe and styling review: You go through your clothing options and the photographer helps identify what will photograph best under studio lighting.
Test shots and adjustments: A few quick test frames let the photographer refine lighting and let you get comfortable in front of the camera.
Main session: The actual shooting, with the photographer directing posing, expression, and energy throughout.
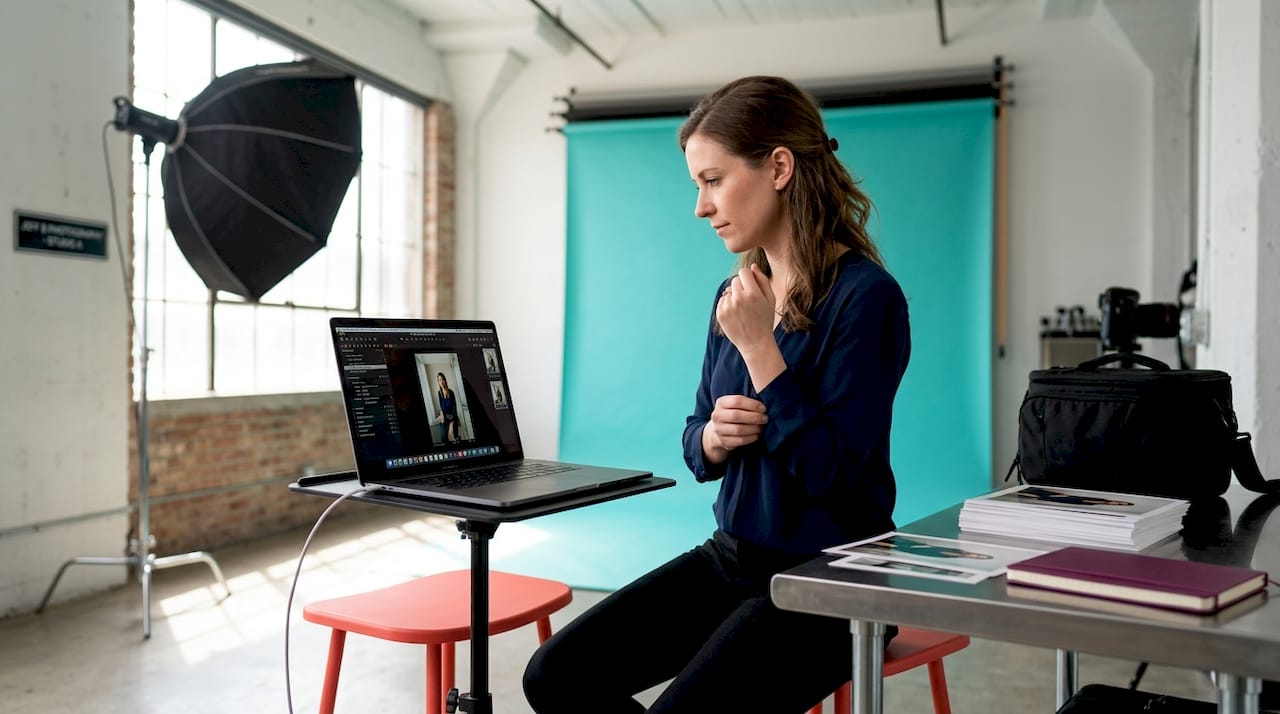
Image review (optional but valuable): Reviewing selects on a tethered screen during the session helps confirm you’re getting what you need.
Post-session editing and delivery: Professional editing, consistent retouching, and timely delivery complete the experience.
Studio sessions typically run 90 minutes to 3.5 hours depending on the package, the number of looks, and how many people are involved. Knowing this ahead of time removes the pressure of feeling rushed.
Wardrobe choices have a bigger impact than most people expect. Solid colours photograph better than busy patterns. Clothes that fit well under studio lighting look more intentional than anything too casual or too formal for your industry. Dark tones read as authoritative. Lighter tones read as approachable. Neither is wrong. It depends on the story your images need to tell.

Professional makeup for photography is a different discipline than everyday makeup. It accounts for how studio lighting flattens features and how the camera reads contrast. A makeup artist who specialises in photography can add definition that reads naturally on screen, even if it feels like more than usual in person.
Pro Tip: Bring two or three wardrobe options rather than deciding in advance. What reads beautifully in natural light sometimes looks flat under studio strobes. Having options lets you and your photographer make the call on the spot.
Studio equipment and space essentials
The physical space matters more than most clients realise when they’re evaluating photographers.
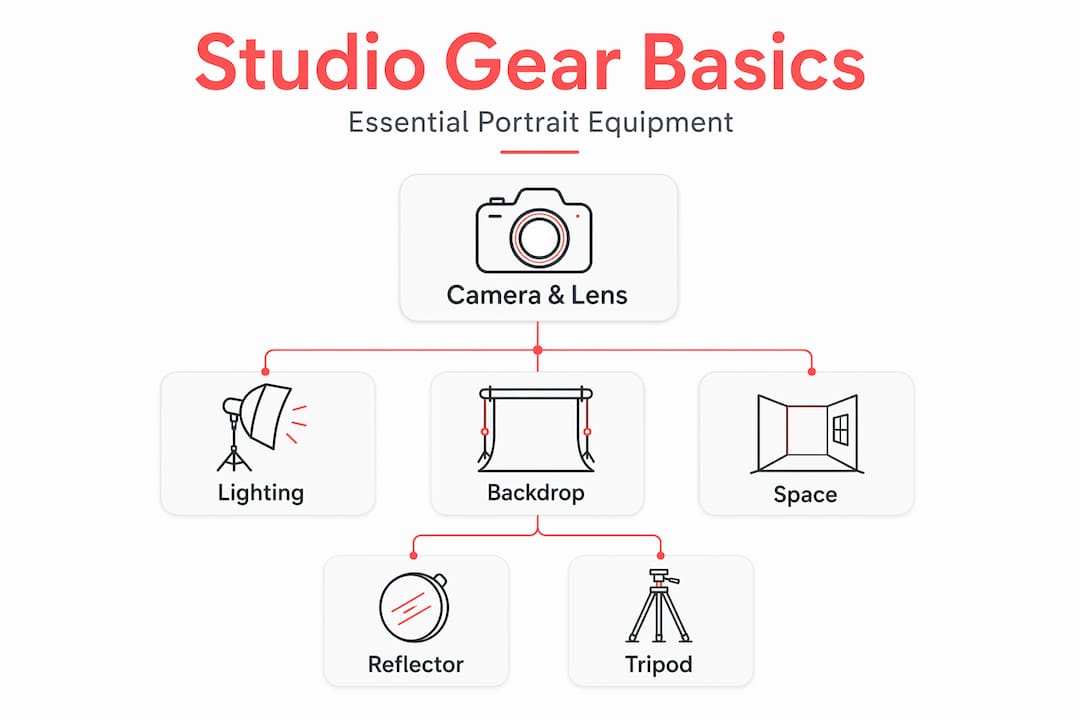
A studio that’s too small limits your lighting options and creates distortion from short shooting distances. For professional portraits, you want enough room to place your key light well away from the subject, keep the background far enough back to control it independently, and give the photographer room to work with different focal lengths.
Here’s a quick look at how backdrop options compare:
Backdrop type | Best for | Trade-off |
Seamless paper | Clean, minimal headshots and portraits | Tears and marks easily, needs replacement |
Muslin or fabric | Textured, warmer portrait looks | Wrinkles unless well-maintained |
Vinyl or PVC | Durable, easy to clean | Can show reflections under direct light |
Painted canvas | Fine art and character portraits | Heavier and harder to travel with |
Digital/composite | Creative branding and themed work | Requires post-production time |
Background control also comes down to distance. Placing subjects five to eight feet from the backdrop and keeping light off the background itself produces clean, dark tones without needing an expensive black backdrop. This technique uses the inverse square law to your advantage. Light falls off quickly with distance, so a well-lit subject in front of an unlit background creates natural separation and depth.
Lens selection shapes the portrait just as much as lighting does. For headshots, an 85mm or 105mm lens at moderate apertures (f/4 to f/8) produces flattering compression without distorting facial features. Wider lenses exaggerate perspective and push noses forward, which tends to look unflattering in professional portrait studio imaging.
Planning shot lists and predefining camera-to-subject distances based on studio dimensions helps photographers maintain consistency across large groups. This is especially useful for team headshots where you need every frame to match.
Choosing the right studio photography service
You have options. Plenty of them. The challenge is evaluating those options before you’ve experienced the results firsthand.
Start with the portfolio. A photographer’s existing work tells you more than any pricing page. Look for consistency across multiple subjects. Do the images look intentional? Does the lighting flatter different skin tones? Does the editing feel timeless or trendy?
Questions worth asking before you book:
What’s included in the session fee, and what’s delivered at the end?
How are final images delivered, and in what formats?
Do you offer a pre-shoot consultation, or do we figure it out on the day?
What’s your approach for people who are nervous in front of the camera?
Can I see examples of team headshots or group sessions if that’s what I need?
Corporate headshot standards are higher than they’ve ever been, particularly with the dominance of LinkedIn and professional platforms that put your face front and centre. A blurry, poorly lit headshot signals neglect. A clean, confident portrait signals professionalism before anyone reads a single word about you.
Pricing structures vary widely. Some photographers charge by the hour. Others offer flat-rate packages that include a set number of edited images. For businesses booking team headshots, per-person rates with a minimum often apply. The best approach is comparing what’s delivered, not just what’s charged.
My honest take on what actually works
I’ve spent years in studio sessions, both behind the camera and observing how clients experience them. The technical side of studio photography gets a lot of attention. Lighting ratios, backdrop types, gear specs. But in my experience, none of that matters as much as whether the client feels comfortable.
I’ve seen technically perfect setups produce mediocre photos because the subject was tense and uncertain. And I’ve seen simple one-light setups produce genuinely stunning portraits because the person in front of the lens finally relaxed and showed up as themselves.
The lighting advice I’d give anyone: keep it simple. A single quality key light and a reflector for fill is a setup that produces excellent results without complexity getting in the way of the session. You can add lights later. First, learn what one light can do.
For clients, the biggest preparation win is this: come in with clear examples of images you admire. Not to copy them exactly, but to give your photographer a sense of the direction and energy you’re drawn to. That conversation is worth more than any amount of technical setup.
What I find most rewarding about this work is the moment people see their photos for the first time and genuinely like what they see. For many of them, that’s a rare experience. A well-run studio session can change how someone feels about being photographed entirely.
— Jeff
Book your professional session with Itsjeffb
[
If you’re ready to get professional studio photos that actually work for your brand, Itsjeffb makes the whole process straightforward and stress-free. Whether you need a polished headshot for your LinkedIn profile, a complete team headshot session for your organisation, or personal branding portraits for your business, the experience is guided from start to finish.
Jeff works with individuals and businesses across Calgary, bringing the same clean, natural aesthetic to every session. Right now, there’s a monthly headshot special available for individuals looking to refresh their professional image without the complexity. Sessions are built to feel easy, deliver real results, and give you photos you’ll actually want to use. Check out Calgary’s best headshots and book your session today.
FAQ
What is studio photography used for?
Studio photography is used for corporate headshots, personal branding portraits, team photos, product imagery, and family or children’s portraits. The controlled environment produces consistent, professional results suited to websites, LinkedIn, and marketing materials.
How many lights do you need for studio portraits?
Most professional portrait sessions use one or two lights, typically a key light and a fill. Simple setups with softboxes or reflectors often produce better, more natural results than complex multi-light arrangements.
How should I prepare for a studio photography session?
Bring two to three wardrobe options in solid colours, review examples of images you like beforehand, and schedule a pre-shoot consultation with your photographer. Session length typically ranges from 90 minutes to 3.5 hours depending on the package.
What backdrop should a studio use for headshots?
Seamless paper backdrops in neutral tones are the most common choice for clean professional headshots. For dark or black backgrounds, subject-to-backdrop distance of five to eight feet and careful light control achieve the effect naturally.
How do I choose a professional studio photographer?
Review their portfolio for consistency across different subjects and skin tones, ask about session inclusions and image delivery, and look for a photographer who offers a pre-shoot consultation. Clear communication and an established process are strong indicators of a professional experience.
Recommended
Comments